
Chapati Flour: A Staple of Indian Cuisine
If you make a purchase after clicking on one of our links, we may get a small commission.
Introduction to Chapati Flour:
Chapati flour, also known as atta in Hindi, is a finely milled whole wheat flour primarily used to make traditional Indian flatbreads such as chapati, roti, and paratha. It is a cornerstone of Indian, Pakistani, and other South Asian cuisines, playing an integral role in everyday meals. Chapati flour is distinct from other types of wheat flour due to its fine texture, high gluten content, and nutrient-dense properties. Its versatility and nutritional value make it a healthy choice not only for traditional foods but also for modern baking and cooking.
In this article, we will explore the origins of chapati flour, how it is made, its nutritional benefits, its role in various cuisines, and how you can use it in your kitchen.
Making chapati (or roti) is a simple process that requires just a few basic ingredients and tools. Here is a step-by-step guide to making soft and delicious chapatis.
Ingredients:
- 2 cups chapati flour (whole wheat flour)
- ¾ cup warm water (change on a case-by-case basis)
- 1 tablespoon oil (optional)
- A pinch of salt (optional)
Tools:
- Mixing bowl
- Rolling pin
- Flat griddle or tawa
- Flat spatula
Step-by-Step Instructions:
- Prepare the Dough
- Combine the Ingredients:
- In a large mixing bowl, add 2 cups of chapati flour.
- Optionally, add a pinch of salt for flavor and 1 tablespoon of oil for extra softness.
- Gradually add warm water (around ¾ cup), a little at a time.
- Knead the Dough:
- Begin mixing the water and flour with your hand or a spoon until it starts forming a rough dough.
- Knead the dough using the heel of your hand for 5–7 minutes until it becomes smooth and elastic.
- The batter ought to be delicate however not tacky. If it feels too dry, add a little more water; if it’s too sticky, sprinkle some more flour.
- Once kneaded, cover the dough with a damp cloth or a lid and let it rest for 20–30 minutes. Resting helps the gluten develop, making the dough easier to roll and resulting in softer chapatis.
- Divide and Shape the Dough:
- Divide the Dough:
- After the batter has rested, partition it into little, equivalent estimated segments. Each portion should be roughly the size of a golf ball (about 1–2 inches in diameter).
- Roll each portion into a smooth ball between your palms to remove any cracks.
- Flatten the Dough:
- Take one dough ball and lightly dust it with flour to prevent sticking.
- Press it down gently to form a small disc with your hands.
- Roll Out the Chapati
- Roll the Dough:
- Utilizing a moving pin, carry out the batter on a delicately floured surface. Start from the center and roll outward, applying gentle, even pressure.
- Pivot the batter regularly to guarantee an even thickness.
- Aim for a thin, circular disc about 6–8 inches in diameter. The chapati should be even and not too thick or thin.
Tip: If the dough sticks to the rolling pin or surface, lightly dust it with more flour. Avoid overusing flour, as this can make the chapatis dry.
- Cook the Chapati
- Heat the Griddle:
- Place a flat griddle or tawa on medium-high heat. Allow it to get hot before placing the chapati on it. To test if it’s ready, sprinkle a few drops of water on the surface—they should evaporate quickly.
- Place the Chapati on the Griddle:
- Gently place the rolled-out chapati on the hot griddle. After about 20–30 seconds, you should see small bubbles forming on the surface.
- Flip the Chapati:
- Once you see bubbles and the underside has light brown spots, flip the chapati using a spatula.
- Cook the other side for another 20–30 seconds until it develops brown spots.
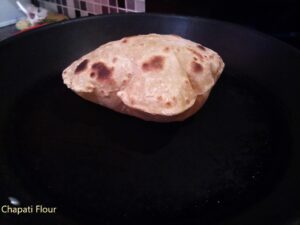
- Cook on Direct Heat (Optional for Puffing):
- For puffed-up chapatis, you can directly place the chapati on an open flame using tongs or press it gently with a clean cloth while it’s on the griddle. This helps it puff up. Flip quickly to avoid burning.
- If you prefer not to use direct flame, you can press the edges of the chapati lightly with a spatula while it’s on the griddle to help it puff up.
- Serve
- Remove the chapati from the griddle and place it in a covered container lined with a clean kitchen towel. This will keep the chapatis warm and soft.
- Optionally, brush the chapati with a little ghee or butter for extra flavor.
Tips for Making Perfect Chapatis:
- Rest the dough: Allowing the dough to rest for at least 20–30 minutes helps make the chapatis soft and easier to roll.
- Roll evenly: Ensure that the chapatis are rolled out evenly to cook uniformly. Thick chapatis may be tough, and thin ones may become dry or crispy.
- Heat control: The griddle should be hot enough to cook the chapatis quickly but not so hot that it burns them before they’re fully cooked.
- Water consistency: Adding the right amount of water during kneading is crucial. If it’s too firm, the chapatis may be hard; if it’s too soft, it will be difficult to roll.
- Cover to keep soft: Always keep cooked chapatis covered with a cloth or lid to retain moisture and softness.
Variations:
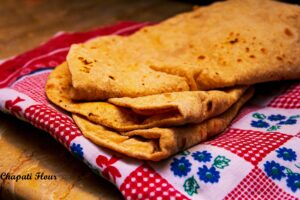
- Chapati: Chapati is the most basic and common flatbread made with chapati flour. It is simple, quick to make, and requires only flour, water, and a little bit of salt. The mixture is moved into flimsy adjusts and cooked on a hot iron. It can also be puffed up over an open flame, creating layers inside the bread.
- Roti: The terms roti and chapati are often used interchangeably, but roti can sometimes refer to thicker versions of the bread. It is also made from chapati flour and is a staple across India, especially in the northern regions.
- Paratha: Paratha is a layered, fried flatbread that is often stuffed with ingredients like potatoes, paneer, or vegetables. The dough for paratha is rolled out, folded with oil or ghee, and then re-rolled before frying on the pan. Paratha tends to be richer and more indulgent compared to chapati or roti.
- Puri: Puri is a deep-fried bread made with chapati flour. The dough is rolled into small circles and fried in hot oil, where it puffs up into a crispy, golden bread. Puris are often served with rich curries or eaten during festivals and special occasions.
- Stuffed Chapatis: You can stuff the chapati dough with fillings like mashed potatoes (aloo), paneer, or spinach before rolling them out, turning them into delicious parathas.
- Masala Chapatis: Add spices like cumin seeds, chili powder, or fresh herbs like coriander to the dough for extra flavor.
Nutritional Benefits of Chapati Flour:
Chapati flour is highly regarded for its health benefits due to its whole grain composition. Since it contains the bran and germ, it is richer in nutrients compared to refined flours. Here are some of the key nutritional benefits of chapati flour:
- Rich in Fiber: The bran in chapati flour is an excellent source of dietary fiber, which aids digestion and helps prevent constipation. High-fiber diets are also associated with lower cholesterol levels and reduced risk of heart disease.
- Low Glycemic Index: Whole wheat flour has a low glycemic index (GI) compared to refined flours, meaning it causes a slower and more gradual rise in blood sugar levels. This makes chapati flour a healthier option for people with diabetes or those looking to manage their blood sugar levels.
- Good Source of Protein: Wheat is a decent source of plant-based protein, and chapati flour contains about 12–13% protein by weight. This protein, along with the gluten content, helps in forming the dough structure and ensures soft and fluffy chapatis.
- Packed with Essential Nutrients: Chapati flour is rich in vitamins such as B-complex vitamins (B1, B3, and B9) and minerals such as iron, magnesium, and zinc. These supplements support energy digestion, resistant capability, and generally wellbeing.
- Heart-Healthy Fats: Though wheat has a small fat content, the fats found in the germ are heart-healthy, unsaturated fats, which contribute to overall cardiovascular health.
The Role of Chapati Flour in Indian Cuisine:
Chapati flour plays a crucial role in daily Indian cuisine. In most Indian households, roti or chapati is a daily bread served alongside curries, lentils (dal), vegetables, and pickles. It is typically eaten at both lunch and dinner, acting as a vessel to scoop up flavorful curries or as a side to more complex dishes.
How to Use Chapati Flour in Your Kitchen:
Chapati flour is not limited to making flatbreads. Its whole wheat properties make it an excellent alternative for other baking and cooking applications. Here are some ideas on how you can use chapati flour in your kitchen:
- Baking Bread: Chapati flour can be used in whole or mixed with other flours to make whole wheat bread, rolls, and buns. It provides a hearty texture and a subtle nutty flavor to baked goods.
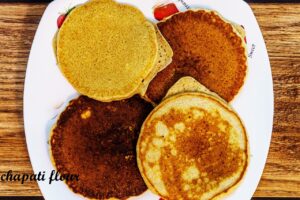
- Pancakes and Crepes: You can substitute chapati flour in recipes for pancakes or crepes for a healthier, whole-grain version. The natural elasticity of the flour helps create a smooth batter for thin, soft pancakes.
- Cookies and Muffins: For a fiber-rich alternative, chapati flour can be incorporated into cookies, muffins, and even cakes. It adds a wholesome texture while retaining moisture in baked goods.
- Thickening Soups and Stews: Due to its slightly coarse texture, chapati flour can be used as a thickening agent for soups, stews, and gravies. It enhances the richness of dishes without affecting the flavor too much.
Final Thoughts:
Chapati flour, or atta, is more than just a staple of Indian cuisine — it is a symbol of tradition, health, and culinary versatility. Whether you are making simple chapatis for your everyday meals or exploring new ways to incorporate whole wheat into your diet, chapati flour offers a rich array of benefits and uses. Its nutritional properties make it a smart choice for those looking to improve their diet, and its adaptability means you can experiment with it in various recipes beyond the flat breads it is known for.